
Last Updated: October 25, 2026
Quick Summary
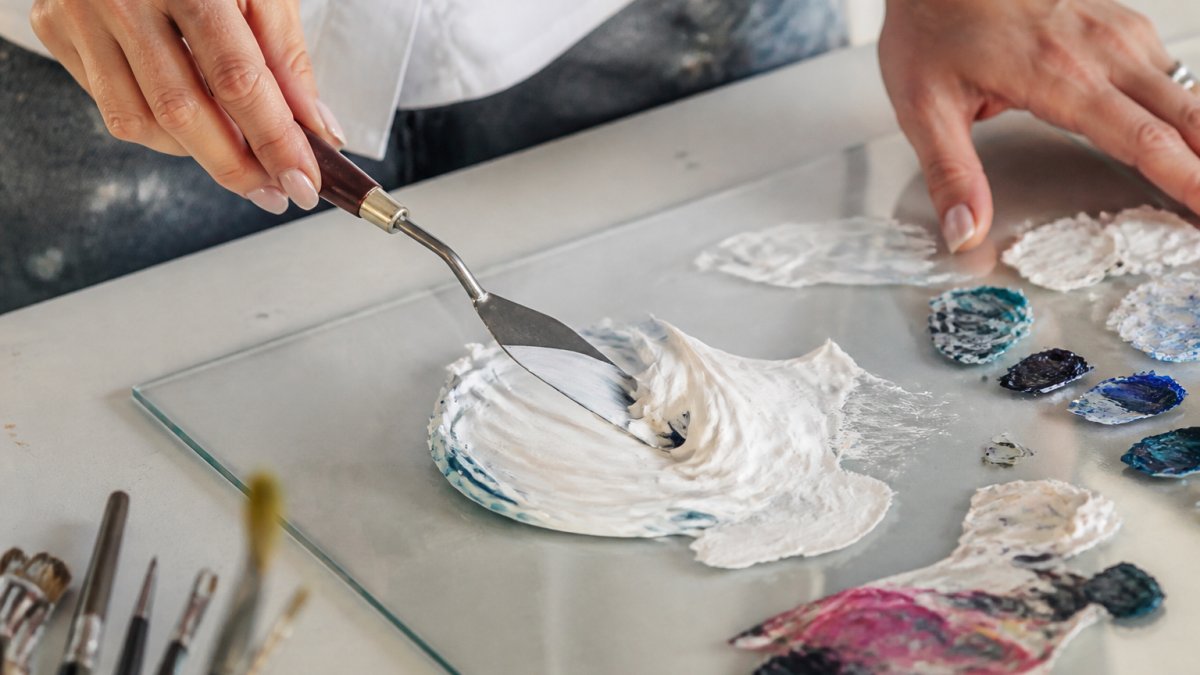
Mix texture medium into your paint in small amounts, starting at roughly equal parts, and fold rather than stir with a palette knife until the color is even. Test a peak with the knife tip and adjust with more paint or more medium until it holds its shape.
- Acrylic medium sets within hours, while oil medium stays wet for days.
- A ready mix leaves a ridge that holds at least five seconds without drooping.
- For sharp sculptural knife ridges, push toward 2 : 1 with a peak-holding impasto medium.
- Build modeling paste relief in layers of roughly 1/8 inch or less, drying each first.
- Layer impasto from dark to light, letting darker thinner texture set before lighter thicker passages.
Table of Contents
- Why Texture Medium Changes Everything in Impasto Painting
- How to Thicken Acrylic Paint for Impasto
- The Impasto Medium to Paint Ratio: Getting Workable Consistency
- Using Modeling Paste for Acrylic Painting and Sculptural Marks
- How to Prevent Impasto Paint from Cracking
- Applying and Layering Thick Paint with Brushes and Palette Knives
- Choosing Your Texture Medium and Starting Your First Impasto Piece
- Frequently Asked Questions
Why Texture Medium Changes Everything in Impasto Painting
Texture medium is a gel or paste added to paint to build thick, raised, three-dimensional surfaces without weakening the color.
Impasto has always meant thick paint piled on so each stroke stands off the surface.
Adding medium is not just about thickness. It changes how the paint handles, how long it stays workable, and how well it grips the canvas.
The value question comes up often with collectors. Why original palette knife paintings are expensive explains what heavy, layered texture actually adds to a finished piece.
Acrylic vs. Oil Impasto Mediums
Acrylic impasto mediums are the practical choice for most painters: they dry fast, clean up with water, and hold peaks well at the right ratio.
The core difference is drying time: acrylic medium sets within hours, so you can build layers in a day, while oil medium stays wet for days, letting you rework passages but slowing the process.
A common mistake is treating the two as interchangeable. Acrylic medium mixed into oil paint will not bind properly.
How to Thicken Acrylic Paint for Impasto
The fastest way to thicken acrylic paint for impasto is a purpose-made impasto or texture medium, not water or extra paint. Water weakens the binder; more paint just gives more flat result.
Here is our step-by-step method:
- Squeeze out the paint you need on a clean palette.
- Add medium in small amounts, starting at roughly equal parts.
- Fold, don't stir, with a palette knife until the color is even.
- Test a peak with the knife tip.
- Adjust with more paint or more medium until it holds.
The goal is a consistency that stands up when you lift the knife: if it slumps flat within seconds, add medium; if it drags and crumbles, add paint.
The Impasto Medium to Paint Ratio: Getting Workable Consistency
A workable impasto medium to paint ratio depends on the product, the pigment, and the peak height you want. There is no universal number, but these starting points are reliable launch pads, adjust by feel.
| Medium type | Starting ratio (medium : paint) | Best for |
|---|---|---|
| Heavy-body gel medium | 1 : 1 | Visible brushstrokes, moderate peaks |
| Impasto medium (peak-holding) | 1 : 1 to 2 : 1 | Palette knife ridges, sculptural marks |
| Modeling paste | 1 : 1, or applied as a base layer | Maximum relief, carving, opaque texture |
| Light modeling paste | 1.5 : 1 | Lighter-weight texture on larger supports |
Start at the lower medium load and add more. It is far easier to thicken a mix than to rescue one that has lost its color strength.
Why pigment changes the ratio
Not all acrylic paint behaves the same when you add medium. Titanium white and most earth colors are dense and hold a peak with less medium. Transparent or highly saturated pigments, phthalo blue, quinacridone magenta, some yellows, turn soupy faster because the pigment load is lower relative to the binder. Start those closer to 1 : 1 and add medium in small increments; if the color looks chalky, add more paint.
The three consistency tests
Use these in order; each catches a different failure mode.
- The peak test. Drag the palette knife through the mix and lift straight up. A ready mix leaves a ridge with a sharp edge that holds at least five seconds without drooping. If it slumps, add medium; if it crumbles, add paint.
- The ribbon test. Lift a loaded knife and let the mix fall back onto the palette. A workable impasto mix falls in a short, thick ribbon that folds on itself; a thin stream means too thin, stiff chunks too dry.
- The finger-press test. Press a clean finger into the mix. It should leave a clean indentation with crisp edges and no wet residue. A sticky fingerprint means too much medium; a crumbly edge too little.
Diagnosing a bad mix
- Too thin (slumps, runs, loses peaks): add more medium in small amounts, folding with the knife.
- Too stiff (drags, crumbles, skips): add paint, or a drop of water if the mix is already paint-forward. Use water sparingly, only after the medium load is correct.
- Color weakened or chalky: the medium load is too high. Add paint until the color reads true again, then re-test the peak.
Adjusting for the effect you want
For soft, rounded brushstrokes, aim for a mix that just holds its shape, closer to 1 : 1. For sharp, sculptural knife ridges, push toward 2 : 1 with a peak-holding impasto medium.
Always read the manufacturer's label first. Most brands state a recommended mix ratio and whether the medium is flexible or rigid, guidance that overrides any general rule, because formulas vary significantly.
Using Modeling Paste for Acrylic Painting and Sculptural Marks
Modeling paste is the heaviest option in the texture toolbox: a thick, opaque paste that builds real relief and sculptural marks and takes paint well once dry. Use it for genuine volume, not just brushstrokes.
Two ways to use it
Mixed into paint. Fold modeling paste into acrylic paint at roughly 1 : 1 for colored texture that holds a peak, the approach for colored impasto ridges where you want the paste's body and the paint's color in one pass.
As a base layer. Apply modeling paste directly to a primed support, carve or shape it while wet, let it dry fully, then paint over it.
Practical rules for modeling paste
- Apply over a properly primed, rigid support. Modeling paste dries harder and less flexible than gel medium, so a flexing canvas is more likely to crack it. Rigid panels and well-stretched, primed canvas are safer.
- Keep thick applications to a reasonable depth. Build relief in layers of roughly 1/8 inch or less, letting each layer dry before the next. One deep slab is far more likely to crack or sag than several thinner layers.
- Score or key the surface between layers. A light crosshatch with a knife tip on a dried layer gives the next layer something to grip.
Modeling paste vs. gel medium vs. impasto medium
| Product | Body | Flexibility | Opacity | Best use |
|---|---|---|---|---|
| Heavy-body gel medium | Moderate | High | Translucent | Visible brushstrokes, flexible layers |
| Impasto medium | High | Moderate | Translucent to semi-opaque | Peak-holding knife ridges |
| Modeling paste | Very high | Low | Opaque | Sculptural relief, carving, base layers |
| Light modeling paste | High | Moderate | Opaque | Larger supports where weight matters |
Troubleshooting modeling paste
- Cracking: usually too thick a single layer, too flexible a support, or application over a still-wet layer beneath. Build thinner, dry fully between layers, and use a rigid panel.
- Sagging: the paste is too wet or applied too thick. Let it set slightly before shaping, and build in layers.
- Poor paint adhesion over dried paste: the surface is too smooth or too absorbent. Lightly sand, wipe clean, and seal with gel medium or gesso before painting.
For raised, sculptural surfaces, modeling paste delivers, provided it is applied in layers, on a rigid support, and sealed before color goes down.
How to Prevent Impasto Paint from Cracking
To prevent impasto paint from cracking, control three things: the thickness of each layer, the flexibility of your medium, and the rigidity of your support. Cracking almost always traces back to one of these, thick paint on a flexible canvas that gets bumped will crack, as will a heavy layer over a still-wet one.
Our rules for crack-free impasto:
- Build up in layers rather than one deep slab.
- Let each layer dry fully before the next.
- Use a medium labeled flexible for thick work.
- Paint on a rigid panel or a well-stretched, primed canvas.
Sagging and adhesion problems follow the same logic. If paint slides or peels, the surface prep or the mix is the culprit. Prime the support, keep the medium compatible, and don't push the ratio past what holds.
Once a textured piece is finished, handling and display matter just as much. Displaying textured palette knife paintings covers how to protect a thick, raised surface long term.
Applying and Layering Thick Paint with Brushes and Palette Knives
Application is where the mix pays off. Load a palette knife with the thickened paint, press it onto the canvas, then lift with a slight twist to leave a peaked ridge.
Layer from dark to light: put down darker, thinner texture first, let it set, then build lighter, thicker passages on top.
If you are new to the knife, our guide to palette knife painting techniques for beginners walks through the basic strokes before you add heavy texture.
Choosing Your Texture Medium and Starting Your First Impasto Piece
Choosing a texture medium comes down to the effect you want. Gel medium gives a flexible, translucent body for visible brushstrokes.
Read the label before you buy. Manufacturers state the recommended mix ratio and whether the medium is flexible or rigid.
Then start small.
When you are ready to see the full process in practice, our complete guide to textured palette knife floral art shows how layered texture comes together into a finished painting. And if you want to see what heavy, layered acrylic texture looks like in a finished original, the Spring Blossom Abstract is a real example of palette knife work built up in many layers.
Mixing texture medium well is the difference between paint that sits flat and paint that stands up and holds light.
Frequently Asked Questions
Can you mix impasto medium with oil paint?
Yes, but only with an oil-compatible impasto medium, not an acrylic one. Acrylic medium and oil paint will not bind, and the mixture will fail. Oil impasto mediums are typically wax- or alkyd-based and add body without thinning the paint. Check the product label for oil compatibility before mixing. If you are working in acrylics, use an acrylic texture medium or modeling paste instead. Mixing the wrong medium with your paint is one of the most common causes of adhesion failure.
How much texture medium should you mix with acrylic paint?
Start with equal parts medium and paint for a soft impasto, then increase the medium to two or three parts for taller, more sculptural peaks. Add medium in small amounts and stir until the mixture holds a stiff peak when you lift the palette knife. Avoid exceeding roughly three parts medium to one part paint, because too little binder weakens adhesion and can cause flaking. Test a small patch on scrap canvas before committing to a final piece.
How long does impasto paint take to dry?
Thick acrylic impasto can feel dry to the touch in a few hours but needs 24 to 72 hours to cure fully, depending on humidity and how tall the peaks are. Oil impasto dries far more slowly, often taking weeks to months for thick layers. Dry thick layers slowly and evenly, and avoid forcing the process with heat, which promotes cracking. A fan in the room and moderate temperatures help acrylics cure without surface skinning too fast.
Can you use modeling paste for impasto?
Yes. Modeling paste is one of the best mediums for impasto because it holds sharp peaks and sculptural marks without sagging. It dries to a matte, opaque finish and can be carved or sanded once cured. Mix it with acrylic paint to tint it, or apply it first and paint over the dried texture. Keep layers under about a quarter inch thick per coat to reduce cracking risk, and build up in stages rather than one deep application.
